
Recently I flew in to the Maxsled home state of Minnesota for a long weekend of riding. Once my guides, otherwise known as riding buddies, picked me up at the airport we made a run past the Maxsled garage and checked out a couple of sleds for the weekend.
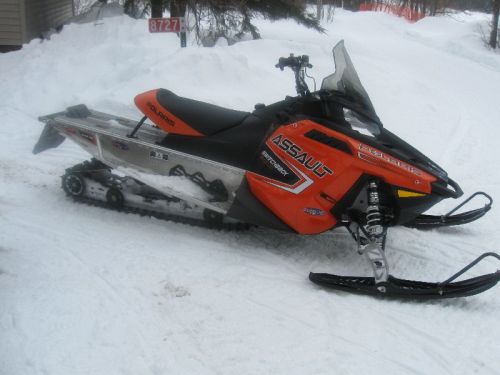

One of the sleds we have for long term testing this year is a 2011 Polaris 800 Assault Switchback in Orange Madness. An eye catching sled to say the least and a great snowmobile for heading to the Crane Lake, Lake Vermilion and Voyageurs National Park/Rainy Lake areas. More on the overall trip in a later article (although I must thank Spring Bay Resort http://www.springbayresort.com/ for the great cabin), but the focus of this article is a little how-to on setting up the 2011 Assault Switchback (with concepts that can be applied to any sled).
Everybody has their own preferences when it comes to suspension setup, but there are some known things that fit us all. When trail riding, we hate sleds that push through the corners. And we also hate sleds that ride like a buckboard. And we hate sleds that transfer too much and lift the skis when trying to accelerate out of the corner.
We found these preferences to be universal amongst the 4 of us on this ride. To set the stage and reference for this article, over 2.5 days of riding we covered 450 miles. That ranged from baby bottom smooth groomed trails, to choppy lake ice, to 18” deep moguled out corners, to 2’ of powder and finally 18” of soft snow on top of a few inches of lake slush. We saw just about every condition of snow/trail you can imagine.
On the first day of our trip, the universal opinion of the Assault was that it was horrible on the trails. I have to admit that I hadn’t really looked at the Assault much as I was spending most of my time on a lovely green F8 Arctic Cat SnoPro so when the other riders with me were complaining about it I decided to take a peak. The big complaints were “It won’t turn” or “It’s the worst pushing sled I’ve ever been on” or “It’s impossible to get the transfer tamed down”. Well one look at the Assault and you have to think that can’t be right. It comes with arguably the best shock package in the industry, Walker Evans needle shocks with full dampening adjustment in all 4 locations in the suspension. Yes, real high quality units. It also has the Pro front suspension and a very good rear suspension although that is where some issues arise for traditional flatland riders (more in a minute). So at the end of day 1’s ride I decided to see what was going on.
The Assault Switchback is basically a ProRMK chassis with a wider ski stance and the standard RMK rear suspension. It has a 144×1.35 Cobra track. It has very good skis, great bars, nice running boards and a very good seating position. Now I know what you are thinking, it’s a 144, it’s going to push. Well maybe, maybe not.
The first thing you need to know about the Assault is that it has an RMK rear suspension (yea, I said that already). And that rear suspension is mounted in the chassis like it is mounted in an RMK. The RMK suspension is a non-coupled suspension and this is what can be a bit of a mystery to flat land riders. The non-coupled suspension has an inherently higher degree of front to rear transfer in it. Great thing if you are climbing a big mountain in 3’ of powder, not so great if you are honking out of a Northern Minnesota trail corner with the throttle pinned.
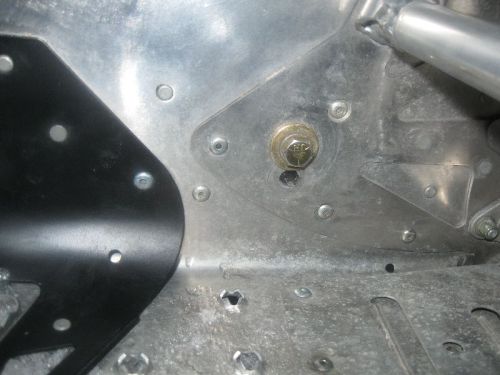
So, if you are riding your Assault Switchback on the trail, which most of you are going to be doing for a considerably amount of time, you have to tame that transfer down. This is IMPOSSIBLE to do with the front rear suspension mount in the factory position… namely the lower of the 2 holes. I know, you are going to be tempted to try, but it will never work. You will get some of the transfer dialed out, but you will be doing things like stiffening the rear torsion springs to full tight and then the ride quality is going to suffer.
So step one, move the front rear suspension mounting location to the upper hole. Yup, it’s only 5/8”, but it will make all the difference in the world. And after we do the other adjustments it won’t have any noticeable effect on off trail or powder performance. Move that mount up and re-adjust track tension. In our test sled it took 10 full turns of adjustment to tighten the track back up after moving the mount, just make sure you tighten it up to factory specs.
Now, in general, if you are tweaking your suspension and you think you need to dial any spring to full tight, STOP! Something else is not right if you have to dial those springs full tight, so don’t do it. After moving the front rear mount to the upper hole, make sure your front track shock preload is set at about ½ preload (1/2 the threads above and below the threaded collar). And while you are in there, set that beautiful black WE shock to 2 clicks of dampening… yes, only 2 clicks of dampening. When counting dampening clicks you start from all the way out (no dampening) and click in from there on the WE shocks.
Now move to the rear of the rear suspension. Set your rear torsion spring preload to the medium setting. I know, you are saying, “But Dan, with it there it sags”. And you would be right and you want sag. Set it to medium. The manual will tell you something else depending on your weight, but set it at medium. We had riders ranging from 175lbs to 270lbs and we never moved it from the medium setting. And set that rear shock to 6 clicks of dampening. You want sag-in in the rear suspension. Half of the bumps you experience on a trail are what I call negative bumps… holes in other words. If you have sag-in then the suspension can ‘fall out’ of the tunnel into those negative bumps and it makes for a much better ride. This isn’t the place to go in to it, but take my word for it, you want the rear end to sag-in some.
[ad code=4 align=center]
So at this point we have the rear suspension setup with its initial setup. We’ll come back to it when we talk fine tuning later. Now let’s move to the front corners.
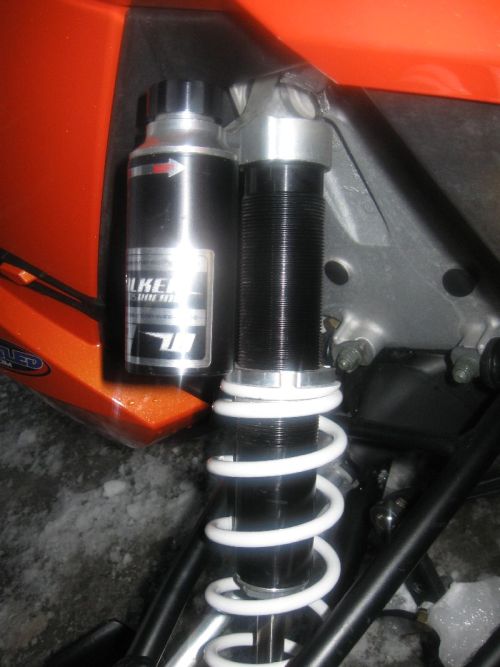
Again, when looking at the Assault, you have 2 beautiful WE clickers sitting out front. It’s a shame not to use them. Now what did I say before about suspension springs? Never full tight. This applies to the front even more than the rear. For our initial adjustment we are going to set the front spring preload at 1” of thread from full tight. (NOTE: We have had a couple of riders report that on their Assaults the 1″ was not enough to keep the spring retainers on. Check yours after making this adjustment to make sure the springs are tight enough to hold the retainers on. You can do this by suspending the front of the sled with a jack under the belly pan. Tighten the springs until the retainers are contacted and then give them 3-4 more full turns to make sure they have tension on them to keep the retainers in place.) Just measure it, estimate it, whatever, but get it close to 1”. And then set the other side the same (count the threads to get them set the same). And as for clicks on the WEs, 6 will do please.

Now we are setup with the initial settings and ready to ride. We want a good balance of turning (no pushing), minimal transfer when on the loud lever hard, and good bump absorption. Did I mention the WE shocks are great shocks? They are. They have like 20 clicks of dampening available. Unless you are Levi LaVallee attempting world record jumps you aren’t ever going to use more than the first 10 clicks of adjustment. If you do, it is going to be so over dampened that it will ride like an empty 1 ton pickup truck down a washboard dirt road.So to review: Front shocks with max minus 1” of preload, dampening clicked in at 6. Front of rear suspension moved to the upper mounting hole, spring preload at half way, 2 clicks of dampening, track tension set to factor specs. Rear torsion springs at medium, 6 clicks of dampening. Go ride.
What about fine tuning? Well here are some general things to think about and how to adjust.
1 – Darting/Pushing – Depending on snow conditions you will experience more than comfortable amounts of darting or pushing on any sled. You tweak that by adjusting front ski spring preload. If it is darting, back a quarter inch of preload at a time out of the front skis. The firmer the snow, the more likely it will be to dart. If it’s pushing (not chattering, but pushing consistently) then dial in a quarter inch of preload at a time.
2 – Front end bottoms out in the bumps – Dial 2 clicks of dampening at a time in to the shocks. Frankly, I don’t think you can tell the difference with just 1 click so I always go 2 clicks at a time.
3 – Front end chatters in the corner – Likely too much dampening, the shocks aren’t recovering or giving enough, dial a couple of clicks out of them at a time.
4 – You feel bottoming in your feet – This one is a little tough, but if you feel the hit in your feet instead of your bum then the front rear suspension shock needs a couple of more clicks of dampening.
5 – You feel bottoming in your butt – Yup, you guessed it, add a couple of clicks of dampening in the rear track shock.
6 – The rear in wants to skip around on you when cornering in the bumps – This is a good indication of too much rear dampening, dial a couple of clicks out of the rear shock.
A brief note on bottoming of the suspension… in my opinion, you want the suspension to bottom out once in a while. That’s how I know I have things dialed in and using all the suspension possible. So if you never bottom your suspension out, dial out some dampening. And never, ever attack bottoming by dialing up spring preload. If you suspect your rear suspension is sagging too much then maybe the springs are shot and need to be replaced. But if you pick your Assault’s (or any modern snowmobile for that matter) rear end up and set it down and it doesn’t sag in 2” or so then you have your rear spring preload too tight.
Finally, the Assault is a terrific sled and even though it has a 144” track on it we were able to dial it in and found it to be a very enjoyable, well-mannered trail sled that shines in the off-trail meadows and powder bays. The comments from the first day were gone and replaced with “I can’t believe it’s the same sled” and “Hey it’s still my turn on the Assault”. None of these changes had any adverse effect on off trail performance and we actually saw an increase in track speed in the powder and against our benchmark sled we saw a 7 mph top end speed increase. Once again proving that a properly setup suspension is good for the rider and the sled.