Contributed by Pat Stadick.
Ride easy or don’t ride at all certainly defines these revolutionary new Assault Shocks and Dive-Tek Crossover Kit that separates Team Fast from their competitors. At first glance, the Assault Shocks installed with the Dive-Tek Crossover Kit uses technology that is currently being used in the big 18-wheelers that are on the road today. It is a cross between a standard shock and an air ride suspension on a semi. It has a unique look that definitely makes it stand out from the standard shock system once installed on your sled. The look is clean, durable and simple. Makes you wonder why nobody has thought of it sooner.
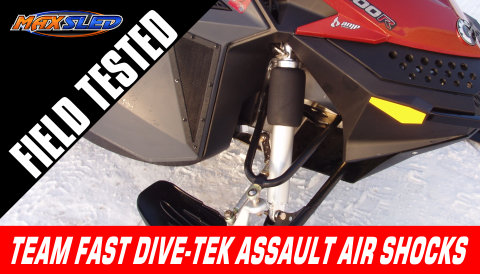
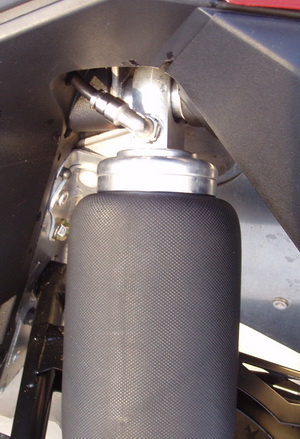
No longer operating separately, these shocks work together by transferring air from one shock to another through the Dive-Tek Crossover kit. This makes for a smooth ride. What really makes the shock unique is the rubber air chamber that measures roughly 5 ½” long by 3 ¼” in diameter. As you can imagine this reservoir provides for a lot of air volume. It’s made out of a very durable rubber but yet is very flexible. This should help to fill the needs of adding reservoirs to existing air shocks to gain more volume.
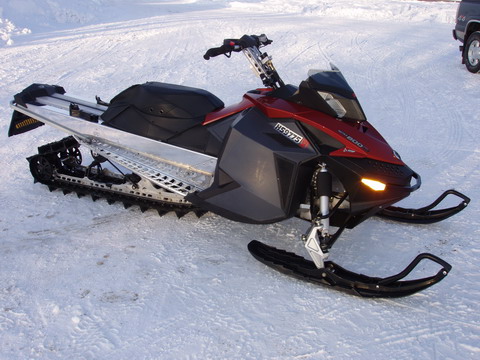
 We installed the product on a 2008 Ski-Doo R Summit 154. Installation is easy and anyone with basic mechanical skills will do fine as the shocks come with a set of instructions that do a good job of guiding you through the process. The first step is to raise the front of your machine up and block it securely so that the skis are off the ground. Next, loosen the upper and lower bolts for your existing shocks and remove the shocks form your machine. Keep the bolts nearby as you will need them to install the Assault Shocks. Next begin with installing the Dive-Tek Crossover Kit, start by removing the Schroeder valves on the top of each shock. It is important to release the air pressure before taking out the valves. Go ahead and install the 90 degree couplings provided where the Schrader valves use to be. Drill a half inch hole behind the top shock mount for the airline to go through to connect to the control valve. It works best to dry fit the shock and find where it works best to drill the hole. Mount the shocks; remember to face the 90 degree elbow outwards so that the set screw is on the bottom on the shock facing towards the rear of the machine. This means there will be a right and left side shock. Go ahead and reinstall the top and bottom shock bolts. Next, let’s turn our attention to the installation of the control valve with gauge. We mounted it halfway up the handlebar rise so we could see the gauge while riding and also somewhat protect it for when you need to roll your machine out of a snow bank. Mounting can vary with different handlebars setups and you can modify it to fit you personal tastes. Plenty of hose is supplied so you can position it to fit your needs.
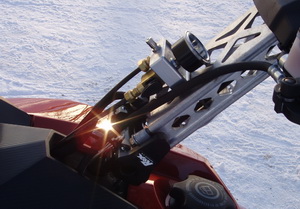 With the control valve mounted, run the line from the valve to each shock. The directions easily explain how to route the lines; as two different styles of coatings are used on the lines. The line with the cloth coating goes to the exhaust side shock; use the zip ties provided to fasten the lines up and out of the way of any moving parts. Remember to leave plenty of slack in the lines to allow for vibration and movement during operation. The valve end of the lines has a compression fitting and the shock end has a push in fitting. Once you have all your connections made, I would advise pumping it up to 40 psi and use soapy water to check for any leaks. It is a lot easier to check your work at the shop than being out on the trail and having them go flat because of a leak. Now its time to go out and test drive your new shocks. The Assault Socks with the Dive-Test Crossover Kit are classy and will give you a nice smooth ride.
We tested Team Assault Shocks with the Dive-Tek Crossover Kit Assesembly. These are a unique looking shock with an air chamber that is larger than any of its competitors. At first glance you might call it a shock on steroids, minus the weight. They are lightweight yet look like a much heavier shock. Don’t worry about the look- they definitely will set your sled apart from the rest.
Testing was done side by side against a 2009 Ski-Doo Summit X 800R-154. It was an easy installation that took less than an hour.
Team Fast recommends starting around 40 psi and dialing in your machine from there. While in our shop, we found that the shocks were almost fully extended and dropped our pressure to 30 psi and began our trials there. Next beginning with crossover valve closed to compare it to factory shocks (this does not allow the air to flow form shock to shock.) We checked how much force was needed to stand with one foot on the a-arm, and the other on the running board, grabbed the handle bars and tried to tip the machine on the side. There was considerable different between the two machines. The effort to throw over the Assault installed machine took about one-third less the effort to throw over a standard stock machine. We all know that after a full day’s riding that this is appreciated! We also noticed that the shock travel was considerable more than the stock shock.
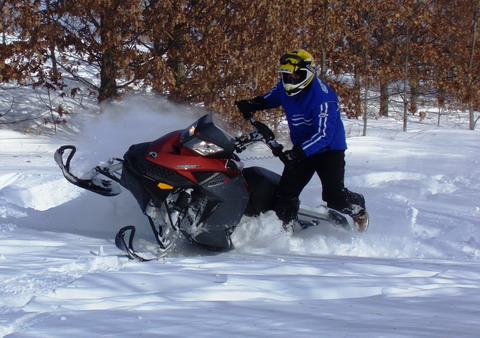
Taking the machine outside and gave it a through test in the snow. We found the Assault shocks gave a pillow like ride to the machine- taking the bunch and jarring out of the machine. The shocks give you the feeling of floating over the snow, ignoring the individual bumps and tying them together.
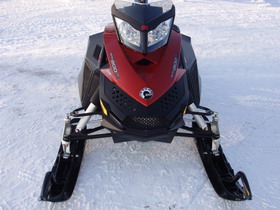 In the deeper snow we found it is definitely easier to lay it on its side and cut a tight corner. It required less effort than the Summit X with factory shocks. With the crossover valve open it allows the air from the inside shock to transfer to the outside shock. This is a great improvement for Ski-Doo which some say have a bad reputation when it comes to boon docking and side hilling. After riding both sleds we consistently chose the sled with Team Fast’s Assault Shocks with the Crossover Kit to give a better ride. We found it to be less work to ride all day long, thereby enjoying our ride more. The shocks gave a nice feel when you come off a drop or the front tend comes slamming back down. You don’t really feel a bottoming of the shock, which in factory installed shocks is normal. We would compare it to an air ride suspension on a semi where you glide over the bumps.
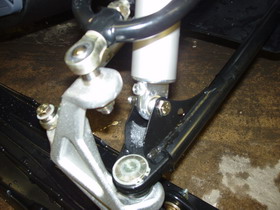 There were a few items that could be improved, which is normal when introducing a new product. The 90 degree elbow that comes out at the top of the shock tends to leak slowly at this connection. Currently, Team Fast is trying a quick connect type fastener, in which you simple push the plastic hose into the fitting with no wrenches needed. Maybe going back to a ferrule type connection would improve this. That is why testing it in the shop before you ride is so important.
A bit of clearance issue was noticed installing the shock on the recoil side of the machine. It seemed to be a tight fit on the outside radius of the top of the shock and the upper shock mount. We were able to work around it and make it work.
Also a good universal mounting plate for the gauge and crossover value would be nice. This is a new product and I am sure this is already in the works.
Overall Team Fast has come out with a great product that I would recommend for those that are serious about side hilling, boon docking improvements and those looking for a smoother ride. These are great looking, lightweight shocks with good handling characteristics. It looks like we will be taking off all our factory shocks and replacing them with Team Fasts Assault Shocks with the Dive-Tek Crossover Kit. Hat’s off to Team Fast for giving those who enjoy snowmobiling another great product.
